

Getting Started#
Many of our Help Hub resources are Jupyter notebooks that demonstrate accessing, visualizing, and analyzing data products from NASA’s Earthdata Cloud. You can learn from these notebooks either by viewing the code and results as displayed here, or by downloading the notebooks for your own use in a local or cloud-hosted JupyterLab. If you are unfamiliar with the Earthdata Cloud or the Jupyter project, please read the information below for some important background.
Important
Sign up for an Earthdata Login acount for access to NASA Earthdata.
Earthdata Cloud#
Data in NASA’s Earthdata Cloud are distributed from Amazon Web Services (AWS) simple storage service (S3), allowing users to freely access Earth observations either by download to their own computer or by direct access from other AWS platforms. Direct access to the Earthdata Cloud from AWS is an alternative to downloading data; this can benefit workflows that process a large amount of data or that require highly concurrent access to lots of different data. We recommend the NASA Earthdata Cloud Cookbook, a resource maintained by the NASA-Openscapes community, for in-depth guidance on these topics.
JupyterHub instances maintained by CryoCloud, Openscapes, NASA MAAP, and NASA Goddard’s Open Science Studio are all examples of platforms operating in AWS with direct access to the Earthdata Cloud. We encourage you to visit these organizations to learn about options for using these existing platforms. Alternatively, you may want to learn about getting started with AWS for Earth data.
All tutorials in the Help Hub are applicable whether you plan to download data or access it directly from AWS. The Data Access notebook steps through differences between the two approaches in detail.
Jupyter Setup#
An advantage that comes with community-maintained JupyterHubs is having a complete Jupyter ecosystem at your fingertips. Even so, the default ecosystem will probably not be capable of running all the Help Hub tutorials. Here are two ways to get a Jupyter ecosystem that’s ready to run them all:
On a bring-your-own-image capable JupyterHub: run a container from the image built for CryoCloud
Without a JupyterHub: run JupyterLab from a Conda environment
Using a Container#
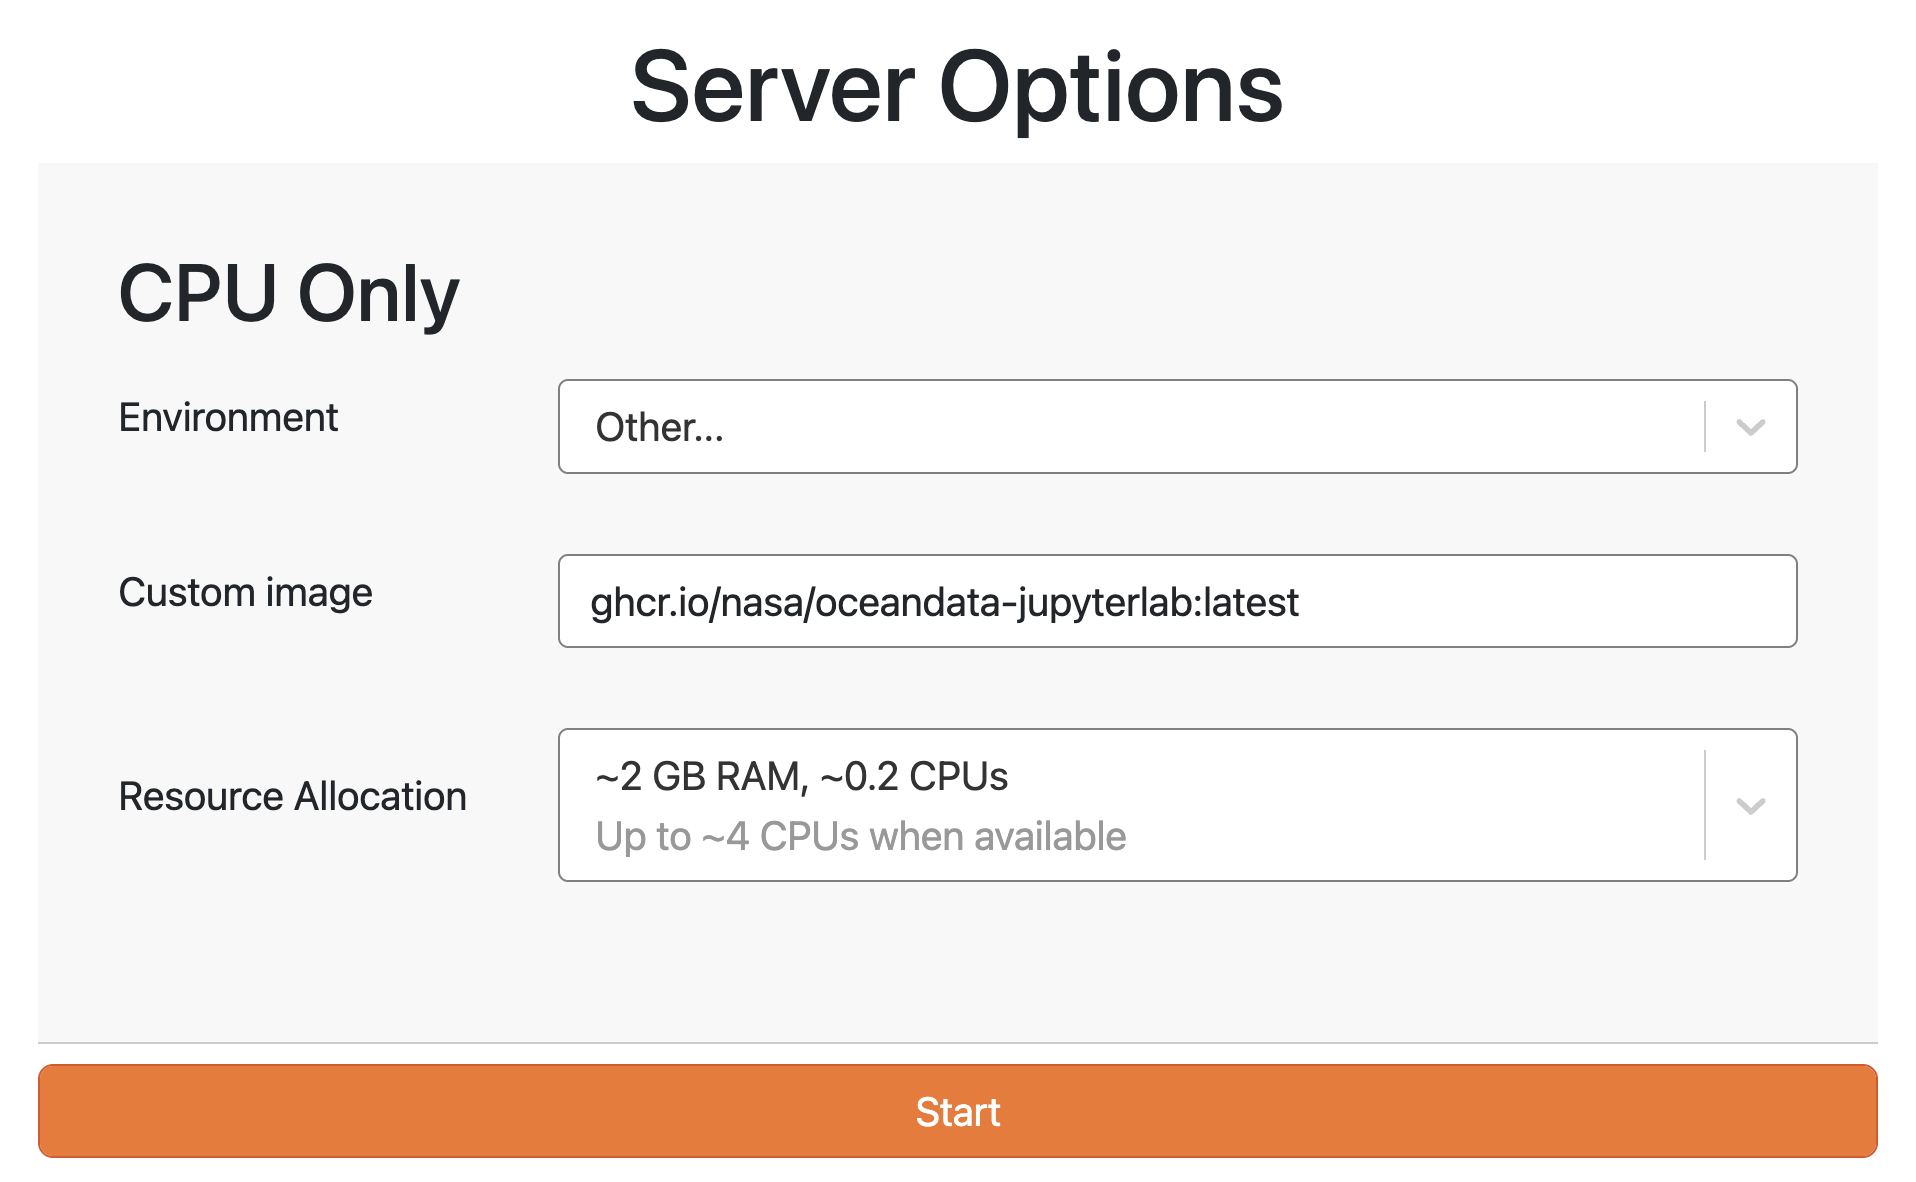
For the first option, login to your JupyterHub and start a server from the ghcr.io/nasa/oceandata-jupyterlab image.
We recommend using the “latest” version of this image to create your container,
but note that this version is dynamic and will be updated without warning.
Use this version by entering ghcr.io/nasa/oceandata-jupyterlab:latest, with no spaces, as depicted below.
Alternatively, to avoid any updates, use a date string formatted as “YYYYMMDD” for the version in place of “latest”.
Using a Conda Environment#
For the second option, download our conda-lock.yml configuration file,
which specifies exact versions of packages on Conda-Forge and PyPI that must be installed.
You need Mamba available to create an environment from this configuration file;
you can use either the mamba command that comes with Conda (recommended) or the Micromamba distribution.
With that file in a download folder (denoted by <DIR>) and a name you’ve chosen (denoted by <NAME>) for a new environment, run in a Terminal:
mamba create --name <NAME> --file <DIR>/conda-lock.yml
mamba install --name <NAME> --file <DIR>/conda-lock.yml --category notebooks
mamba install --name <NAME> --file <DIR>/conda-lock.yml --category jupyter
If you are familiar with creating additional ipython kernels for an existing Jupyter server, you can skip the installs from --category jupyter and do that instead.
Otherwise, start JupyterLab from within the new environment as follows, and try out any Help Hub notebook locally.
mamba run --name <NAME> jupyter lab
Getting Help#
Have a question or an idea? Share it with us on the Earthdata Forum using tags OBDAAC (under DAAC) and Data Recipes (under Services/Usage).