Versioning and Releases
Versioning
We use a global versioning approach, meaning version numbers in cumulus are consistent across all packages and tasks, and semantic versioning to track major, minor, and patch version (i.e. 1.0.0). We use Lerna to manage our versioning. Any change will force lerna to increment the version of all packages.
Read more about the semantic versioning here.
Pre-release testing
Note: This is only necessary when preparing a release for a new major version of Cumulus (e.g. preparing to go from
6.x.xto7.0.0)
Before releasing a new major version of Cumulus, we should test the deployment upgrade path from the latest release of Cumulus to the upcoming release.
It is preferable to use the cumulus-template-deploy repo for testing the deployment, since that repo is the officially recommended deployment configuration for end users.
You should create an entirely new deployment for this testing to replicate the end user upgrade path. Using an existing test or CI deployment would not be useful because that deployment may already have been deployed with the latest changes and not match the upgrade path for end users.
Pre-release testing steps:
-
Checkout the cumulus-template-deploy repo
-
Update the deployment code to use the latest release artifacts if it wasn't done already. For example, assuming that the latest release was
5.0.1, update the deployment files as follows:# in data-persistence-tf/main.tfsource = "https://github.com/nasa/cumulus/releases/download/v5.0.1/terraform-aws-cumulus.zip//tf-modules/data-persistence"# in cumulus-tf/main.tfsource = "https://github.com/nasa/cumulus/releases/download/v5.0.1/terraform-aws-cumulus.zip//tf-modules/cumulus" -
For both the
data-persistence-tfandcumulus-tfmodules:- Add the necessary backend configuration (
terraform.tf) and variables (terraform.tfvars)- You should use an entirely new deployment for this testing, so make sure to use values for
keyinterraform.tfandprefixinterraform.tfvarsthat don't collide with existing deployments
- You should use an entirely new deployment for this testing, so make sure to use values for
- Run
terraform init - Run
terraform apply
- Add the necessary backend configuration (
-
Checkout the
masterbranch of thecumulusrepo -
Run a full bootstrap of the code:
npm run bootstrap -
Build the pre-release artifacts:
./bamboo/create-release-artifacts.sh -
For both the
data-persistence-tfandcumulus-tfmodules:-
Update the deployment to use the built release artifacts:
# in data-persistence-tf/main.tfsource = "[path]/cumulus/terraform-aws-cumulus.zip//tf-modules/data-persistence"# in cumulus-tf/main.tfsource = "/Users/mboyd/development/cumulus/terraform-aws-cumulus.zip//tf-modules/cumulus" -
Review the
CHANGELOG.mdfor any pre-deployment migration steps. If there are, go through the steps and confirm that they are successful -
Run
terraform init -
Run
terraform apply
-
-
Review the
CHANGELOG.mdfor any post-deployment migration steps and confirm that they are successful -
Delete your test deployment by running
terraform destroyincumulus-tfanddata-persistence-tf
Updating Cumulus version and publishing to NPM
1. Create a branch for the new release
From Master
Create a branch titled release-MAJOR.MINOR.x for the release (use a literal x for the patch version).
    git checkout -b release-MAJOR.MINOR.x

e.g.:
    git checkout -b release-9.1.x
If creating a new major version release from master, say 5.0.0, then the branch would be named release-5.0.x. If creating a new minor version release from master, say 1.14.0 then the branch would be named release-1.14.x.
Having a release branch for each major/minor version allows us to easily backport patches to that version.
Push the release-MAJOR.MINOR.x branch to GitHub if it was created locally. (Commits should be even with master at this point.)
If creating a patch release, you can check out the existing base branch.
Then create the release branch (e.g. release-1.14.0) from the minor version base branch. For example, from the release-1.14.x branch:
git checkout -b release-1.14.0
Backporting
When creating a backport, a minor version base branch should already exist on GitHub. Check out the existing minor version base branch then create a release branch from it. For example:
# check out existing minor version base branch
git checkout release-1.14.x
# pull to ensure you have the latest changes
git pull origin release-1.14.x
# create new release branch for backport
git checkout -b release-1.14.1
# cherry pick the commits (or single squashed commit of changes) relevant to the backport
git cherry-pick [replace-with-commit-SHA]
# push up the changes to the release branch
git push
2. Update the Cumulus version number
When changes are ready to be released, the Cumulus version number must be updated.
Lerna handles the process of deciding which version number should be used as long as the developer specifies whether the change is a major, minor, or patch change.
To update Cumulus's version number run:
npm run update
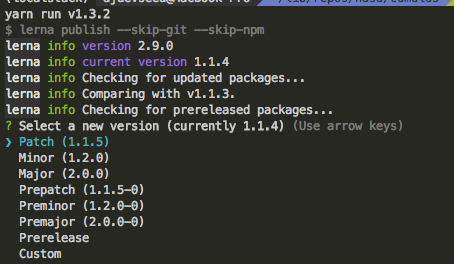
Lerna will handle updating the packages and all of the dependent package version numbers. If a dependency has not been changed with the update, however, lerna will not update the version of the dependency.
2B. Verify Lerna
Note: Lerna can struggle to correctly update the versions on any non-standard/alpha versions (e.g. 1.17.0-alpha0). Additionally some packages may have been left at the previous version.
Please be sure to check any packages that are new or have been manually published since the previous release and any packages that list it as a dependency to ensure the listed versions are correct.
It's useful to use the search feature of your code editor or grep to see if there any references to the old package versions.
In bash shell you can run
find . -name package.json -exec grep -nH "@cumulus/.*MAJOR\.MINOR\.PATCH.*" {} \;
Verify that each of those is updated to the new MAJOR.MINOR.PATCH verion you are trying to release.
A similar search for alpha and beta versions should be run on the release version and any problems should be fixed.
find . -name package.json -exec grep -nHE "MAJOR\.MINOR\.PATCH.*(alpha|beta)" {} \;
3. Check Cumulus Dashboard PRs for Version Bump
There may be unreleased changes in the Cumulus Dashboard project that rely on this unreleased Cumulus Core version.
If there is exists a PR in the cumulus-dashboard repo with a name containing: "Version Bump for Next Cumulus API Release":
- There will be a placeholder
change-mevalue that should be replaced with the Cumulus Core to-be-released-version. - Mark that PR as ready to be reviewed.
4. Update CHANGELOG.md
Update the CHANGELOG.md. Put a header under the Unreleased section with the new version number and the date.
Add a link reference for the github "compare" view at the bottom of the CHANGELOG.md, following the existing pattern. This link reference should create a link in the CHANGELOG's release header to changes in the corresponding release.
5. Update DATA_MODEL_CHANGELOG.md
Similar to #4, make sure the DATA_MODEL_CHANGELOG is updated if there are data model changes in the release, and the link reference at the end of the document is updated as appropriate.
6. Update CONTRIBUTORS.md
./bin/update-contributors.sh
git add CONTRIBUTORS.md
Commit and push these changes, if any.
7. Update Cumulus package API documentation
Update auto-generated API documentation for any Cumulus packages that have it:
npm run docs-build-packages
Commit and push these changes, if any.
8. Cut new version of Cumulus Documentation
If this is a backport, do not create a new version of the documentation. For various reasons, we do not merge backports back to master, other than changelog notes. Documentation changes for backports will not be published to our documentation website.
cd website
npm run version ${release_version}
git add .
Where ${release_version} corresponds to the version tag v1.2.3, for example.
Commit and push these changes.
9. Create a pull request against the minor version branch
-
Push the release branch (e.g.
release-1.2.3) to GitHub. -
Create a PR against the minor version base branch (e.g.
release-1.2.x). -
Configure Bamboo to run automated tests against this PR by finding the branch plan for the release branch (
release-1.2.3) and setting only these variables:GIT_PR:trueSKIP_AUDIT:true
IMPORTANT: Do NOT set the
PUBLISH_FLAGvariable totruefor this branch plan. The actual publishing of the release will be handled by a separate, manually triggered branch plan.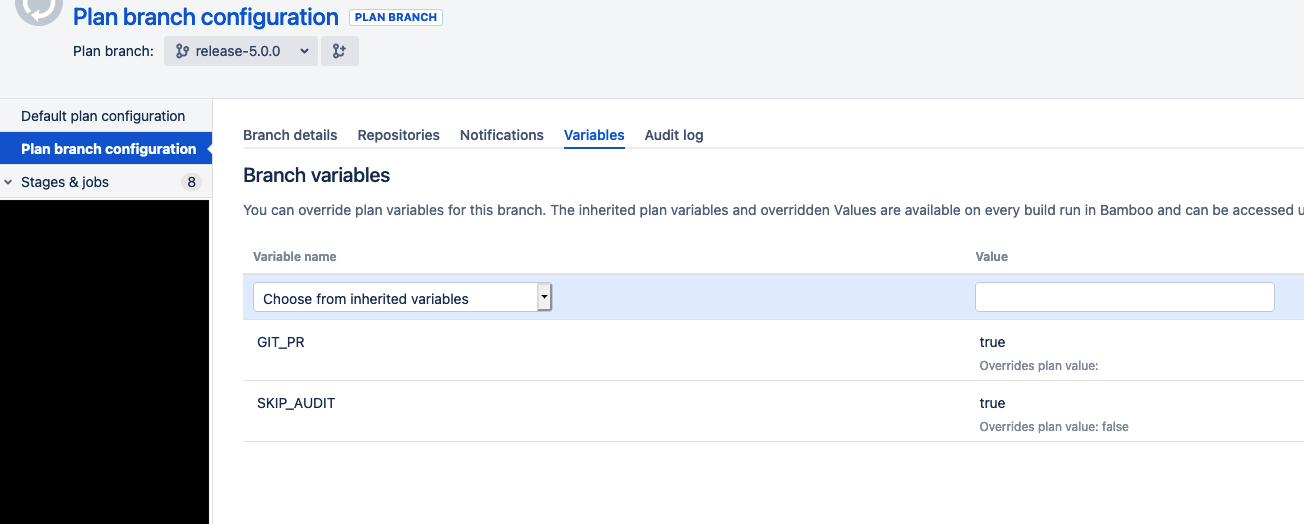
-
Verify that the Bamboo build for the PR succeeds and then merge to the minor version base branch (
release-1.2.x).- It is safe to do a squash merge in this instance, but not required
-
You may delete your release branch (
release-1.2.3) after merging to the base branch.
10. Create a git tag for the release
Check out the minor version base branch (release-1.2.x) now that your changes are merged in and do a git pull.
Ensure you are on the latest commit.
Create and push a new git tag:
    git tag -a vMAJOR.MINOR.PATCH -m "Release MAJOR.MINOR.PATCH"
    git push origin vMAJOR.MINOR.PATCH

e.g.:
    git tag -a v9.1.0 -m "Release 9.1.0"
    git push origin v9.1.0
11. Publishing the release
Publishing of new releases is handled by a custom Bamboo branch plan and is manually triggered.
The reasons for using a separate branch plan to handle releases instead of the branch plan for the minor version (e.g. release-1.2.x) are:
- The Bamboo build for the minor version release branch is triggered automatically on any commits to that branch, whereas we want to manually control when the release is published.
- We want to verify that integration tests have passed on the Bamboo build for the minor version release branch before we manually trigger the release, so that we can be sure that our code is safe to release.
If this is a new minor version branch, then you will need to create a new Bamboo branch plan for publishing the release following the instructions below:
Creating a Bamboo branch plan for the release
-
In the Cumulus Core project (https://ci.earthdata.nasa.gov/browse/CUM-CBA), click
Actions -> Configure Planin the top right. -
Next to
Plan branchclick the rightmost button that displaysCreate Plan Branchupon hover. -
Click
Create plan branch manually. -
Add the values in that list. Choose a display name that makes it very clear this is a deployment branch plan.
Release (minor version branch name)seems to work well (e.g.Release (1.2.x))).- Make sure you enter the correct branch name (e.g.
release-1.2.x).
- Make sure you enter the correct branch name (e.g.
-
Important Deselect Enable Branch - if you do not do this, it will immediately fire off a build.
-
Do Immediately On the
Branch Detailspage, enableChange trigger. Set theTrigger typeto manual, this will prevent commits to the branch from triggering the build plan. You should have been redirected to theBranch Detailstab after creating the plan. If not, navigate to the branch from the list where you clickedCreate Plan Branchin the previous step. -
Go to the
Variablestab. Ensure that you are on your branch plan and not themasterplan: You should not see a large list of configured variables, but instead a dropdown allowing you to select variables to override, and the tab title will beBranch Variables. Then set the branch variables as follow:DEPLOYMENT:cumulus-from-npm-tf(except in special cases such as incompatible backport branches)- If this variable is not set, it will default to the deployment name for the last committer on the branch
USE_CACHED_BOOTSTRAP:falseUSE_TERRAFORM_ZIPS:true(IMPORTANT: MUST be set in order to run integration tests against the.zipfiles published during the build so that we are actually testing our released files)GIT_PR:trueSKIP_AUDIT:truePUBLISH_FLAG:true
-
Enable the branch from the
Branch Detailspage. -
Run the branch using the
Runbutton in the top right.
Bamboo will build and run lint and unit tests against that tagged release, publish the new packages to NPM, and then run the integration tests using those newly released packages.
12. Create a new Cumulus release on github
The CI release scripts will automatically create a GitHub release based on the release version tag, as well as upload artifacts to the Github release for the Terraform modules provided by Cumulus. The Terraform release artifacts include:
- A multi-module Terraform
.zipartifact containing filtered copies of thetf-modules,packages, andtasksdirectories for use as Terraform module sources. - A S3 replicator module
- A workflow module
- A distribution API module
- An ECS service module
Just make sure to verify the appropriate .zip files are present on Github after the release process is complete.
13. Merge base branch back to master
Finally, you need to reproduce the version update changes back to master.
If this is the latest version, you can simply create a PR to merge the minor version base branch back to master.
Do not merge master back into the release branch since we want the release branch to just have the code from the release. Instead, create a new branch off of the release branch and merge that to master. You can freely merge master into this branch and delete it when it is merged to master.
If this is a backport, you will need to create a PR that ports the changelog updates back to master. It is important in this changelog note to call it out as a backport. For example, fixes in backport version 1.14.5 may not be available in 1.15.0 because the fix was introduced in 1.15.3.
Troubleshooting
Delete and regenerate the tag
To delete a published tag to re-tag, follow these steps:
  git tag -d vMAJOR.MINOR.PATCH
  git push -d origin vMAJOR.MINOR.PATCH

e.g.:
  git tag -d v9.1.0
  git push -d origin v9.1.0